
How to Enable Filters on Snapchat
Have your location or color filters vanished? Usually all you need to do is turn them back on in the settings to enable filters on Snapchat. Here's how to do it, step by step.
Prefer a video? Watch the full tutorial below.
Enabling filters on Snapchat, step by step
Open Settings
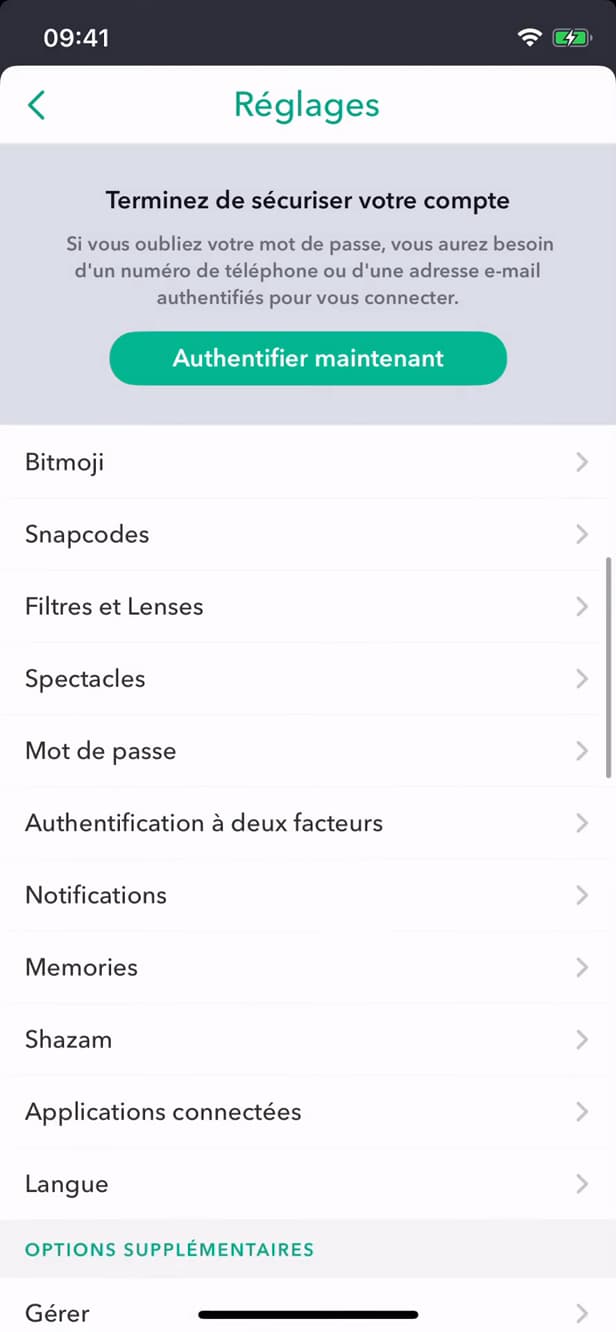
Open Settings "⚙️" from your profile. On the camera screen, tap your "profile", then the "⚙️" icon to open Settings.
Open "Manage"
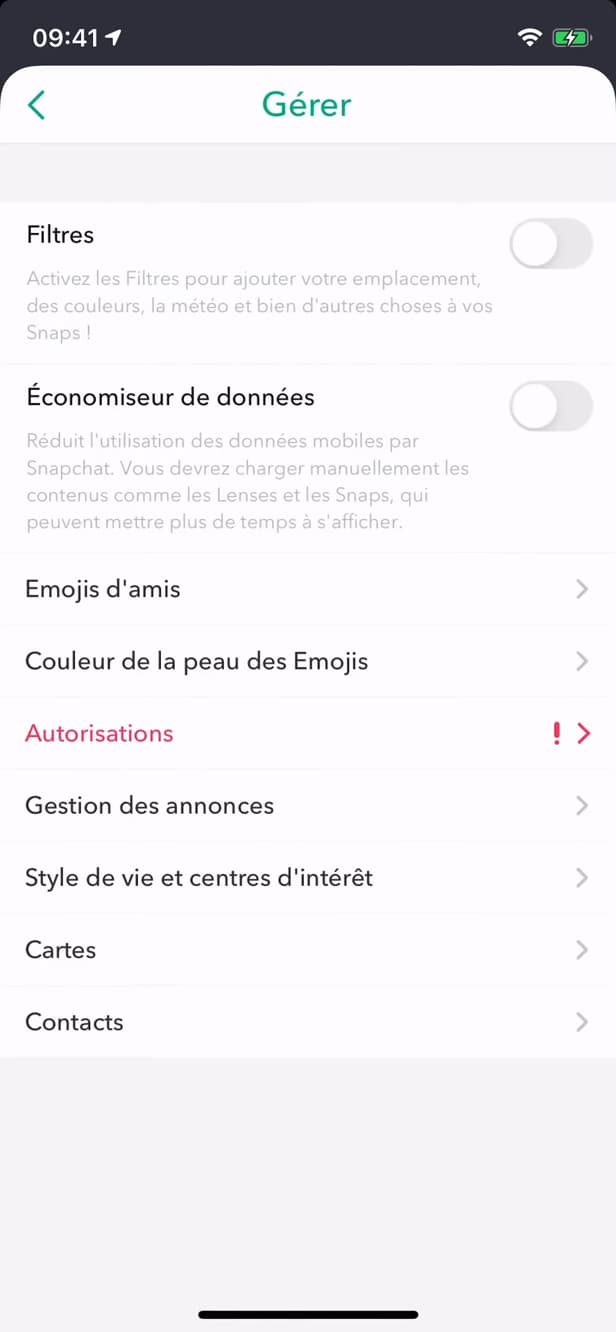
"Manage" groups services like "Filters". Scroll down to "Additional Services" and open "Manage". That's where you'll find the "Filters" option.
Turn on "Filters"
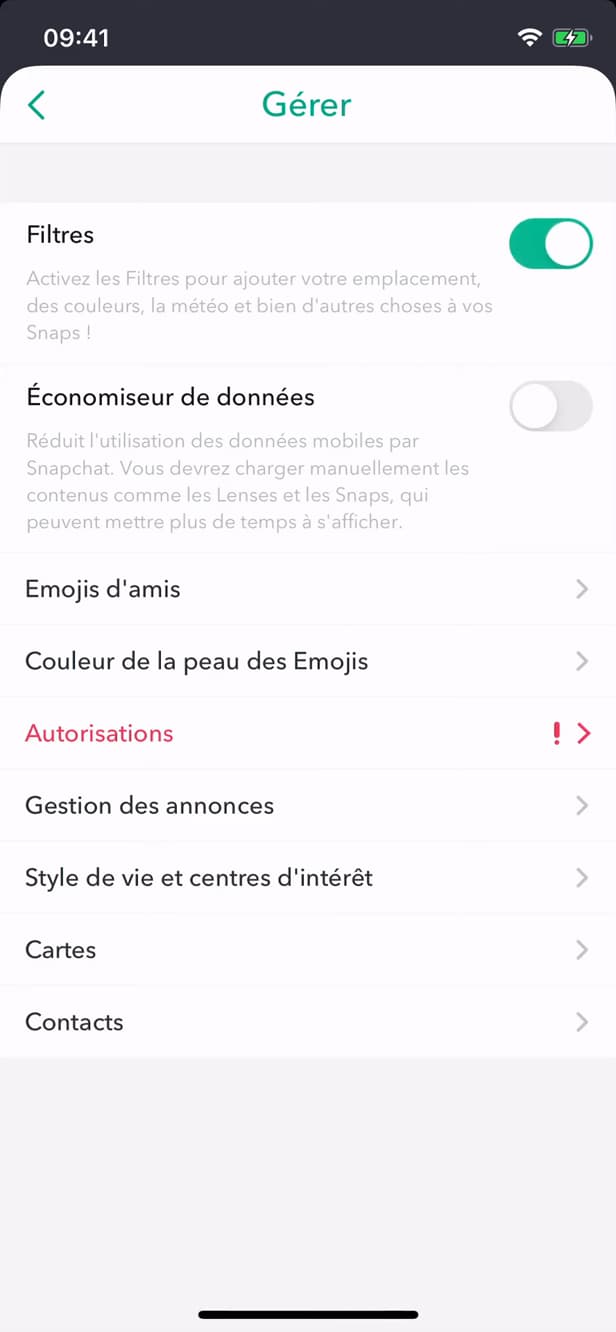
Turn on "Filters" to get location and color filters back. Toggle the "Filters" switch on. They reappear when you swipe left or right after taking a Snap.
Good to know
Filters are available again: take a Snap, then "swipe" across the screen to scroll through them. For "location" filters (geofilters), remember to allow "location" access too.
Good to know
- For location filters, allow "location" access under "Permissions".
- Scroll through filters by "swiping" the screen after taking a Snap.
- "Lenses" (face effects) are managed separately, on the camera screen.
Frequently asked questions
- Why don't my filters show up anymore?
- Often because the "Filters" option has been turned off, or because location access is denied for location filters.
- How do I make location filters appear?
- Turn on "Filters", then allow Snapchat's "location" access to "Always" or "While Using the App".
- Are Filters and Lenses the same thing?
- No. Filters are overlays (location, time, color) applied after the Snap; Lenses are real-time effects on your face.
Related tutorials
 SnapchatHow to Turn On Dark Mode on SnapchatWant to switch Snapchat to a dark theme? Here's how to turn on dark mode, step by step.
 SnapchatHow to Turn Off Flashbacks on SnapchatAre Snapchat Flashbacks bothering you? Here's how to turn them off, step by step.
 SnapchatHow to change your email address on SnapchatWant to change the email linked to your Snapchat account? Here's how to do it, step by step.
 SnapchatHow to Change the Language on SnapchatIs Snapchat in the wrong language? Here's how to change the app's language, step by step.