
How to Make Your Cover Photo Private on Facebook
Want to make a cover photo private on Facebook so it's no longer visible to everyone? Good to know: your current cover photo always stays public, but you can hide your old cover photos by switching them to "Only me". Here's how to do it, step by step.
Prefer a video? Watch the full tutorial below.
Making a cover photo private on Facebook, step by step
Open the "Cover photos" album
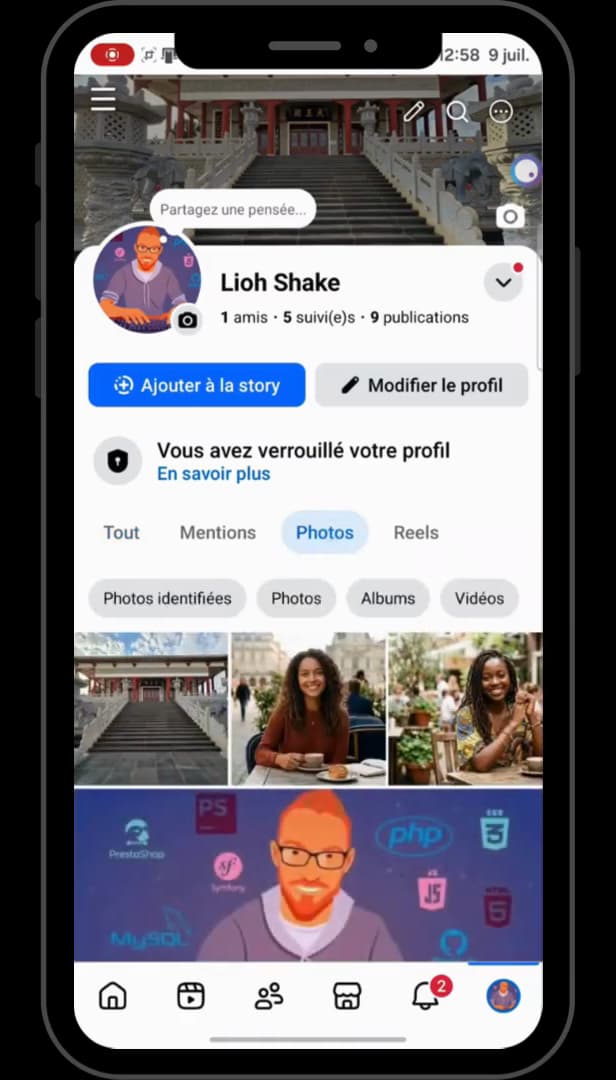
Your old covers are grouped in the "Cover photos" album. On your Facebook "profile", open the "Photos" tab, then "Albums", and finally the "Cover photos" album.
Open an old cover photo
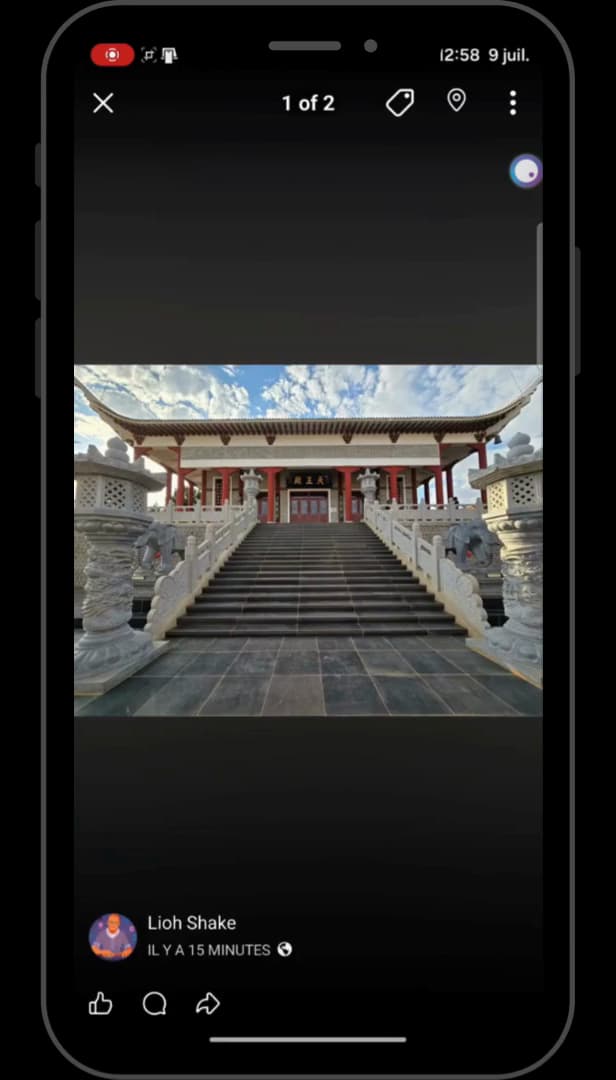
Only old covers can be made private. Tap an "old" cover photo to open it full-size.
Open "Edit privacy"
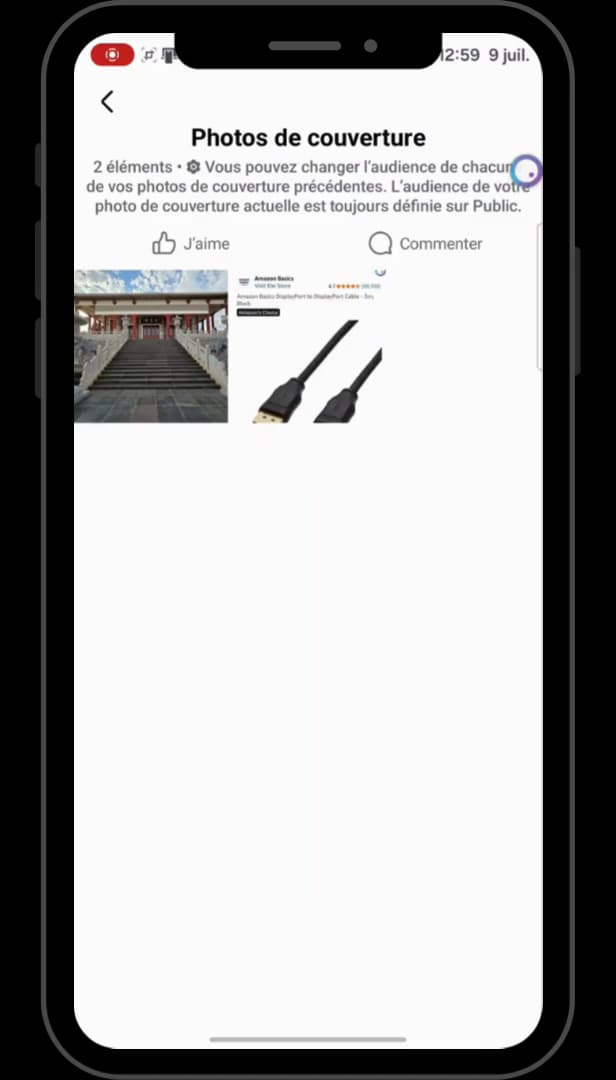
"Edit privacy" only appears on old covers. Tap the "three dots" at the top right, then scroll down to "Edit privacy" (padlock icon).
Choose "Only me" and save
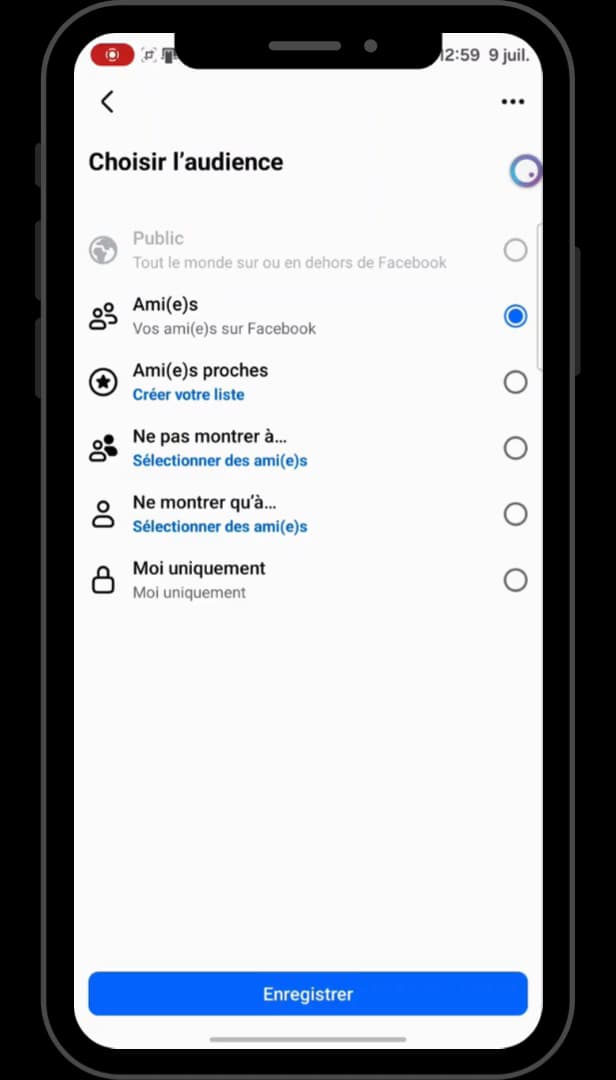
"Only me" hides the photo from everyone except you. Under "Select audience", choose "Only me", then tap "Save". The cover photo becomes private: only you can see it.
Good to know
Here's the key point: your "current" cover photo can't be made private — it's always public. Only "old" covers accept the "Only me" setting.
Good to know
- To hide your current cover, set a new one: the old one then moves into the album and becomes editable.
- The "Only me" setting can also be applied to other old profile photos.
- You can restore the "Public" audience at any time in the same place.
Frequently asked questions
- Can you make your current cover photo private?
- No. The current cover photo is always public. Only old covers can be switched to "Only me".
- Where is the privacy option?
- By opening an old cover photo, via the three dots at the top right, then "Edit privacy".
- Does "Only me" delete the photo?
- No, the photo stays in your album but becomes invisible to others: you're the only one who can see it.
Related tutorials
 FacebookHow to Change Your Facebook Cover Photo SecretlyWant to change your Facebook cover photo without your friends seeing it? Here's the discreet method, step by step.
 FacebookHow to Change Your Facebook Cover Photo Without Losing Your LikesWant to switch your Facebook cover photo without losing its reactions and comments? Here's the method, step by step.
 FacebookHow to Create a Facebook StoryWant to post a story on Facebook? Here's how to create one with a photo, text and stickers, step by step.
 FacebookHow to Delete a Profile Picture on FacebookWant to remove an old Facebook profile picture? Here's how to delete it, step by step.